
How to install WordPress on localhost
How to install WordPress on localhost Using XAMPP: A Step-by-Step Guide
How to install WordPress on localhost Various local server software options are available for creating a local WordPress site. In this step-by-step tutorial, we will use XAMPP ‒ the most popular cross-platform web server for PHP development.
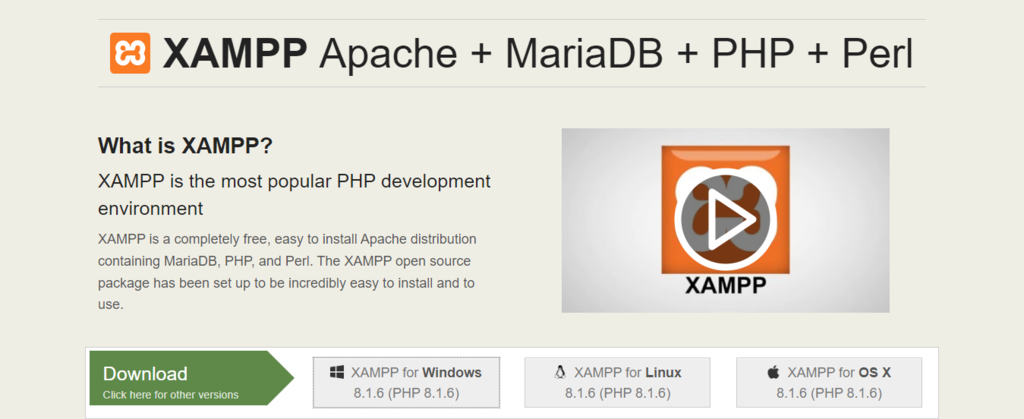
1. Download XAMPP
Go to the official Apache Friends website and download the correct XAMPP software version based on your operating system.
डाउनलोड XAMPP
आधिकारिक Apache Friends वेबसाइट पर जाएं और अपने ऑपरेटिंग सिस्टम के आधार पर सही XAMPP सॉफ़्टवेयर संस्करण डाउनलोड करें।
install WordPress on localhost
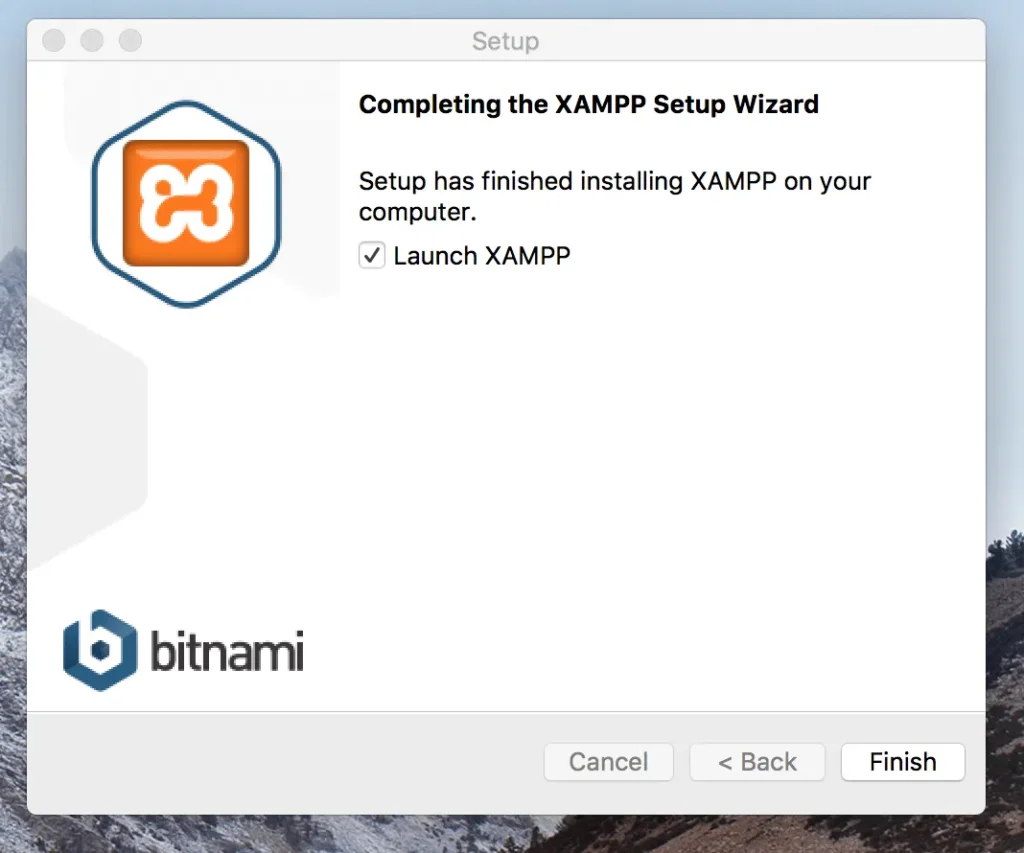
2. Install and Run XAMPP on Your Computer
Run the XAMPP installer and follow the installation instructions using the default settings. If you see a pop-up indicating that your antivirus software might affect the installation process, click Yes to continue.
XAMPP को इंस्टॉल और चलाएं
XAMPP इंस्टॉलर चलाएं और डिफ़ॉल्ट सेटिंग्स का उपयोग करके इंस्टॉलेशन निर्देशों का पालन करें। यदि आपको एक पॉप-अप दिखाई देता है जो सूचित करता है कि आपका एंटीवायरस सॉफ़्टवेयर इंस्टॉलेशन प्रक्रिया को प्रभावित कर सकता है, तो जारी रखने के लिए Yes पर क्लिक करें।
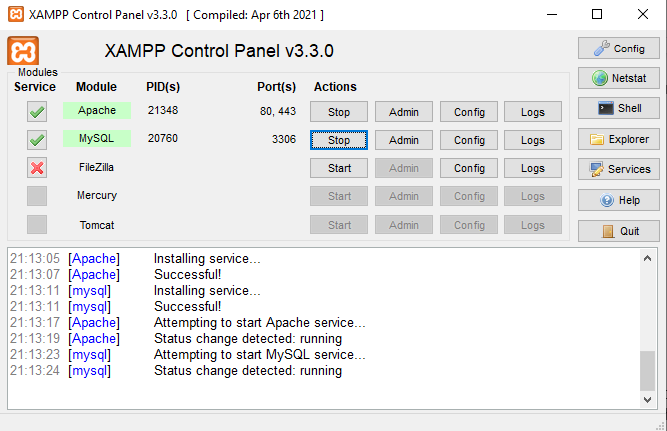
After installing XAMPP, run the application and configure the environment. In the XAMPP control panel, start the Apache and MySQL modules to perform the WordPress localhost installation.
XAMPP को चलाएं और कॉन्फ़िगर करें
XAMPP इंस्टॉल करने के बाद, एप्लिकेशन चलाएं और वातावरण को कॉन्फ़िगर करें। XAMPP नियंत्रण पैनल में, Apache और MySQL मॉड्यूल्स को शुरू करें ताकि वर्डप्रेस लोकलहोस्ट इंस्टॉलेशन किया जा सके।
If you’re running on the Windows operating system, there’s a chance you might encounter the “localhost refused to connect” error. Disabling your firewall temporarily or stopping the program that uses port 80 should resolve this issue.
Windows पर समस्या निवारण
यदि आप Windows ऑपरेटिंग सिस्टम पर चल रहे हैं, तो आपको “localhost refused to connect” त्रुटि का सामना करना पड़ सकता है। इस समस्या को हल करने के लिए, अस्थायी रूप से अपने फ़ायरवॉल को अक्षम करें या उस प्रोग्राम को बंद करें जो पोर्ट 80 का उपयोग करता है।
3. Download WordPress
Once the server is up and running, the next step is installing WordPress. Download the latest WordPress version from the official WordPress site, then extract the ZIP file.
वर्डप्रेस डाउनलोड करें
जब सर्वर चालू हो जाए, तो अगला कदम वर्डप्रेस इंस्टॉल करना है। आधिकारिक वर्डप्रेस साइट से नवीनतम वर्डप्रेस संस्करण डाउनलोड करें, फिर ZIP फाइल निकालें।
Navigate to your XAMPP folder in the C drive (C:\xampp) and locate the htdocs folder. Upload the extracted WordPress files there. We recommend renaming the new folder with your website’s name to make web development on the XAMPP server easier.
XAMPP फ़ोल्डर में वर्डप्रेस फ़ाइलें अपलोड करें
अपने C ड्राइव में XAMPP फ़ोल्डर (C:\xampp) पर जाएं और htdocs फ़ोल्डर खोजें। वहां पर निकाली गई वर्डप्रेस फ़ाइलों को अपलोड करें। हम सुझाव देते हैं कि नए फ़ोल्डर का नाम आपके वेबसाइट के नाम से बदल दें ताकि XAMPP सर्वर पर वेब विकास करना आसान हो सके।
4. Create a Local Database
Go back to your XAMPP control panel and select the Admin button of the MySQL module to launch phpMyAdmin ‒ an administration tool for managing MySQL and MariaDB databases. It will help you create a local MySQL database for the new website.
स्थानीय डेटाबेस बनाएं
अपने XAMPP नियंत्रण पैनल पर वापस जाएं और MySQL मॉड्यूल के Admin बटन को चुनें ताकि phpMyAdmin लॉन्च हो सके ‒ यह MySQL और MariaDB डेटाबेस प्रबंधन के लिए एक प्रशासनिक टूल है। यह नए वेबसाइट के लिए एक स्थानीय MySQL डेटाबेस बनाने में मदद करेगा।
Open the Databases tab and enter the database name into the Create database section. Set the dropdown menu’s value to Collation and hit the Create button. Your new MySQL database should appear on the left sidebar of the web page.
phpMyAdmin में डेटाबेस बनाएं
Databases टैब खोलें और डेटाबेस नाम को Create database अनुभाग में दर्ज करें। ड्रॉपडाउन मेनू के मान को Collation पर सेट करें और Create बटन पर क्लिक करें। आपका नया MySQL डेटाबेस वेब पेज की बाईं साइडबार पर दिखाई देना चाहिए।

5. Install WordPress on Localhost
Finish installing WordPress locally by visiting http://localhost/foldername via your browser. Don’t forget to change the “foldername” placeholder with the folder name you chose in the third step.
लोकलहोस्ट पर वर्डप्रेस इंस्टॉल करें
अपने ब्राउज़र में http://localhost/foldername पर जाकर वर्डप्रेस इंस्टॉल करना समाप्त करें। “foldername” प्लेसहोल्डर को तीसरे चरण में आपने जो फ़ोल्डर नाम चुना है, से बदलना न भूलें।
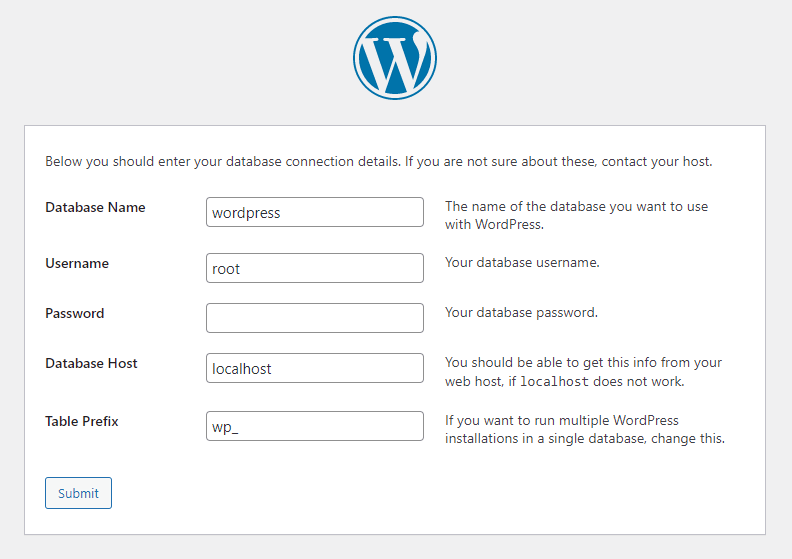
WordPress requires a list of information to build the localhost site. Fill in the database information as follows:
- Database name ‒ the name of the database you created in phpMyAdmin.
- Username ‒ enter
rootas the default username. - Password ‒ leave the MySQL database password field blank.
- Database host ‒ keep the default
localhost. - Table prefix ‒ keep the default
wp_.
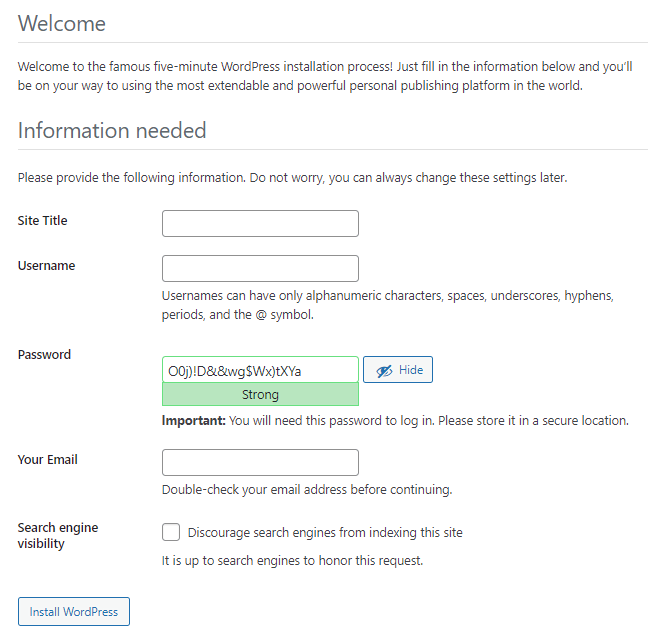
Once done, hit Submit -> Run the installation. Fill in the additional information needed, like the site name and login credentials, and click on the Install WordPress button.
वर्डप्रेस इंस्टॉलेशन जानकारी भरें
वर्डप्रेस को लोकलहोस्ट साइट बनाने के लिए एक सूची की जानकारी की आवश्यकता होती है। डेटाबेस जानकारी भरें:
- Database name ‒ phpMyAdmin में आपने जो डेटाबेस नाम बनाया था।
- Username ‒ डिफ़ॉल्ट उपयोगकर्ता नाम के रूप में
rootदर्ज करें। - Password ‒ MySQL डेटाबेस पासवर्ड फ़ील्ड को खाली छोड़ें।
- Database host ‒ डिफ़ॉल्ट
localhostबनाए रखें। - Table prefix ‒ डिफ़ॉल्ट
wp_बनाए रखें।
समाप्त करने के बाद, Submit -> Run the installation पर क्लिक करें। अतिरिक्त जानकारी भरें, जैसे साइट का नाम और लॉगिन क्रेडेंशियल्स, और Install WordPress बटन पर क्लिक करें।
2 Comments-
-
Nice session
Thank You