

Laravel 11 Vue.js 3 CRUD Application with Composition API
Discover how to create a robust CRUD application using Laravel 11 and Vue.js 3 with the Composition API. This step-by-step guide covers backend setup, API integration, and frontend development, making it perfect for building modern full-stack applications with ease.
Creating Model and API CRUD
We will manage one table called Companies, with four text fields: name, email, address, website.
So, we create the model, and automatically create migrations with -m:
php artisan make:model Company -mThis is the DB structure: database/migrations/xxxxx_create_companies_table.php:
class CreateCompaniesTable extends Migration
{
    public function up()
    {
        Schema::create('companies', function (Blueprint $table) {
            $table->id();
            $table->string('name');
            $table->string('email');
            $table->string('address')->nullable();
            $table->string('website')->nullable();
            $table->timestamps();
        });
    }

    public function down()
    {
        Schema::dropIfExists('companies');
    }
}
Then, of course, we run the migration:
php artisan migrateIn the app/Models/Company.php model, we make all fields fillable:
class Company extends Model
{
    use HasFactory;

    protected $fillable = ['name', 'email', 'address', 'website'];
}
Next, we create a Controller, with a few flags to generate exactly what we need:
php artisan make:controller Api/CompanyController --resource --api --model=CompanyPersonally, I like to use API Resources to transform the data. Although in this project, we won’t make any transformations, I still have a habit of generating them:
php artisan make:resource CompanyResourceAnd, inside of app/Http/Resources/CompanyResource.php, there’s this default code:
class CompanyResource extends JsonResource
{
    public function toArray($request)
    {
        return parent::toArray($request);
    }
}
Next, for validation, we generate a FormRequest class:
php artisan make:request CompanyRequestIn this case, I will re-use the same validation rules for both store/update functions, so this is the content of app/Http/Requests/CompanyRequest.php:
class CompanyRequest extends FormRequest
{
    public function authorize()
    {
        return true;
    }

    public function rules()
    {
        return [
            'name' => ['required', 'string'],
            'email' => ['required', 'email'],
            'address' => ['nullable', 'string'],
            'website' => ['nullable', 'url'],
        ];
    }
}
We use those API Resource and Form Request classes inside of our app/Http/Controllers/API/CompanyController.php, which has this code:
namespace App\Http\Controllers\Api;

use App\Http\Controllers\Controller;
use App\Http\Requests\CompanyRequest;
use App\Http\Resources\CompanyResource;
use App\Models\Company;

class CompanyController extends Controller
{
    public function index()
    {
        return CompanyResource::collection(Company::all());
    }

    public function store(CompanyRequest $request)
    {
        $company = Company::create($request->validated());

        return new CompanyResource($company);
    }

    public function show(Company $company)
    {
        return new CompanyResource($company);
    }

    public function update(CompanyRequest $request, Company $company)
    {
        $company->update($request->validated());

        return new CompanyResource($company);
    }

    public function destroy(Company $company)
    {
        $company->delete();

        return response()->noContent();
    }
}
And, we tie it all together to call that Controller from the routes/api.php:
use App\Http\Controllers\Api\CompanyController;

// ...

Route::apiResource('companies', CompanyController::class);
In this simple project, we won’t use any Middleware, the routes are public.
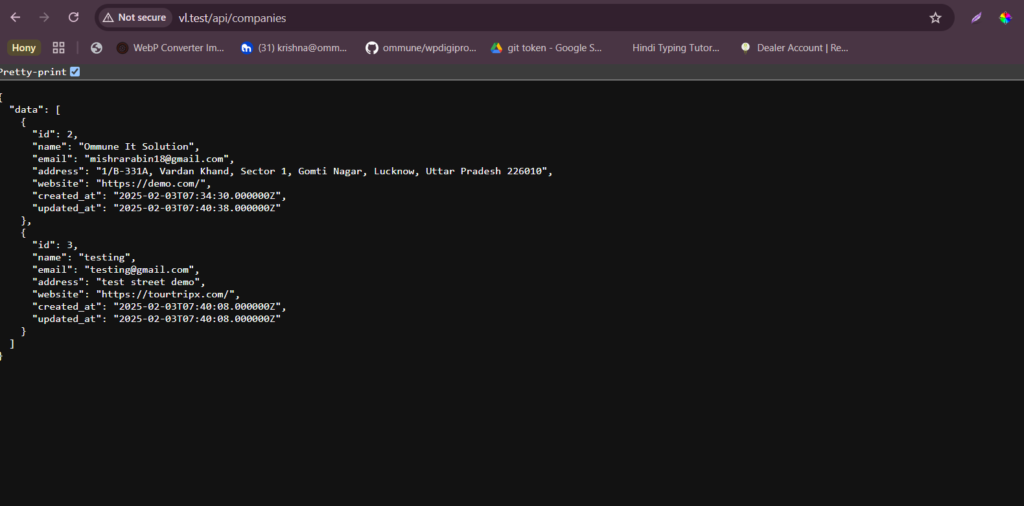
So, at this point, we have an API ready, and if we enter some company manually in the DB, here’s what we get via Postman:
Installing Vue and “Hello World”
Now, we get to the front-end. We install Vue.js, Vue Router and Vue Loader:
npm install vue@latest vue-router@4Next, we need to tell Vite to use vue when compiling. First, install vite vue plugin.
npm install --save-dev @vitejs/plugin-vueThen import Vue plugin import vue from ‘@vitejs/plugin-vue’; in vite.config.js. Then add Vue to plugins array.
Before:
export default defineConfig({
    plugins: [
        laravel({
            input: [
                'resources/css/app.css',
                'resources/js/app.js',
            ],
            refresh: true,
        }),
    ],
});
Make sure Vue is installed in your Laravel project. You can do this using Laravel Mix, which is pre-configured with Laravel.
If Vue isn’t already installed, you can install it by running the following commands:
npm install vue@next vue-loader@next
npm install axios
Create a Vue Component for the Company Form
In your resources/js/components directory, create a new Vue component, e.g., CompanyForm.vue
<template>
  <div class="company-form">
    <form @submit.prevent="submitForm">
      <div>
        <label for="name">Company Name</label>
        <input type="text" id="name" v-model="company.name" required />
      </div>

      <div>
        <label for="email">Company Email</label>
        <input type="email" id="email" v-model="company.email" required />
      </div>

      <div>
        <label for="address">Company Address</label>
        <input type="text" id="address" v-model="company.address" required />
      </div>

      <div>
        <label for="phone">Company Phone</label>
        <input type="text" id="phone" v-model="company.phone" required />
      </div>

      <button type="submit">{{ editMode ? 'Update' : 'Create' }} Company</button>
    </form>

    <!-- Display List of Companies -->
    <div v-if="companies.length">
      <h2>Companies List</h2>
      <ul>
        <li v-for="company in companies" :key="company.id">
          {{ company.name }} ({{ company.email }})
          <button @click="editCompany(company.id)">Edit</button>
          <button @click="deleteCompany(company.id)">Delete</button>
        </li>
      </ul>
    </div>
  </div>
</template>

<script>
import axios from "axios";

export default {
  data() {
    return {
      company: {
        name: '',
        email: '',
        address: '',
        phone: ''
      },
      companies: [],
      editMode: false,
      companyId: null
    };
  },
  created() {
    this.loadCompanies();
  },
  methods: {
    submitForm() {
      if (this.editMode) {
        this.updateCompany();
      } else {
        this.createCompany();
      }
    },
    createCompany() {
      axios
        .post('/api/companies', this.company)
        .then((response) => {
          alert("Company created successfully!");
          this.loadCompanies();
          this.resetForm();
        })
        .catch((error) => {
          console.error(error);
          alert("Failed to create company.");
        });
    },
    updateCompany() {
      axios
        .put(`/api/companies/${this.companyId}`, this.company)
        .then((response) => {
          alert("Company updated successfully!");
          this.loadCompanies();
          this.resetForm();
        })
        .catch((error) => {
          console.error(error);
          alert("Failed to update company.");
        });
    },
    loadCompanies() {
      axios
        .get('/api/companies')
        .then((response) => {
          this.companies = response.data.data;
        })
        .catch((error) => {
          console.error(error);
          alert("Failed to load companies.");
        });
    },
    loadCompanyData(id) {
      this.editMode = true;
      this.companyId = id;
      axios
        .get(`/api/companies/${id}`)
        .then((response) => {
          this.company = response.data.data;
        })
        .catch((error) => {
          console.error(error);
          alert("Failed to load company data.");
        });
    },
    editCompany(id) {
      this.loadCompanyData(id);
    },
    deleteCompany(id) {
      if (confirm("Are you sure you want to delete this company?")) {
        axios
          .delete(`/api/companies/${id}`)
          .then(() => {
            alert("Company deleted successfully!");
            this.loadCompanies();
          })
          .catch((error) => {
            console.error(error);
            alert("Failed to delete company.");
          });
      }
    },
    resetForm() {
      this.company = {
        name: '',
        email: '',
        address: '',
        phone: ''
      };
      this.editMode = false;
      this.companyId = null;
    }
  }
};
</script>

<style scoped>
.company-form {
  max-width: 400px;
  margin: auto;
}

ul {
  list-style-type: none;
  padding: 0;
}

li {
  margin-bottom: 10px;
}

button {
  margin-left: 10px;
}
</style>
Create Routes in Laravel
In the routes/api.php file, you should already have routes like these for your CompanyController
use App\Http\Controllers\Api\CompanyController;

Route::apiResource('companies', CompanyController::class);
Modify the Controller
Make sure the CompanyController is properly set up to handle requests coming from Vue.js. Since your controller already looks good, there’s nothing more to change for it to work with Vue.
5. Add the Vue Component to Your Laravel View
In your resources/js/app.js, import and register the Vue component.
import { createApp } from 'vue';
import CompanyForm from './components/CompanyForm.vue';

createApp({
    components: {
        CompanyForm
    }
}).mount('#app');
Then, in your resources/views/welcome.blade.php (or any other Blade file), add the following code where you want the form to appear:
<div id="app">
    <company-form></company-form>
</div>

<script src="{{ mix('js/app.js') }}"></script>
Compile the Assets
Run the following command to compile your assets:
npm run dev